Blogger has insisted that we all upgrade, if not now then by September for sure. I have seen where several are confused or having problems with uploading and moving photos and then unable to write under once the pictures are loaded. So I am going to see what is what... and try and help some out. This is down and dirty... and not a full tutorial, just some tips to show you that it can be done... just a little differently than you may have done it before. To help... blog text is small, tips/hints are large and in gray. BTW- I am not an expert, this is just what worked or has worked for me.
To start a new post click the +New Post button at the very top of the menu on the left. The new interface is clean, without a bunch of distractions...
The farm this summer has kept us busy. The rain has come in droves, so things are growing madly. The month of July we had more than 11 inches of rain. Most of it came in 3 separate, but heavy rain cycles, with a few worthless showers between. Fortunately, some friends offered us a drip irrigation system, which we had in place, to spread some water a bit more evenly between drenchings.
The first 2 pictures I loaded. Use the picture icon in the menu when creating a post, to find and add the pictures. After the photos loaded to the page, I clicked to the right of the 1st photo to put the cursor at the right, (it shows as a long blinking black line when you do this), it is not visible here. Click enter and the cursor moves down below the picture. Begin typing, then use the menu at the top to align text how you would like it to appear. In my case, the photos are centered, so the text was too. I used the top menu to align left, and kept the photo centered.
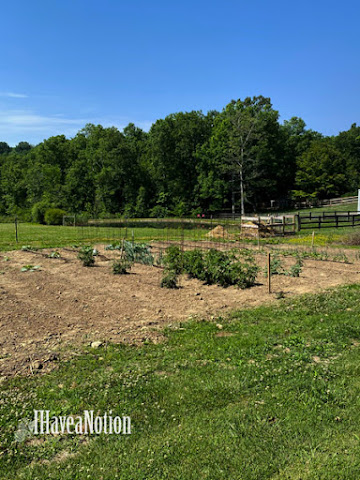
The garden in early spring too. You can see some of the tomatoes, zucchini, onions, and cucumbers, so far. We added lots more plants as they became available.
To edit a photo location or add a caption click the photo once. A small icon menu will appear; choose the alignment, add a caption, make it larger or smaller... etc.
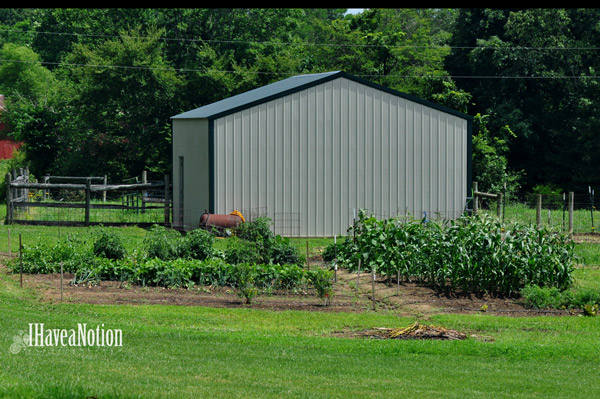
The garden has grown some, and we are looking at it from the other direction. Here you can see the carrots and corn on the right, the blueberry bushes, beans, onions, and tomatoes on the left side. There is more but distinguishing at this distance if difficult.
As in the previous version of Blogger, moving pictures is a pain. If out of order, I usually make them smaller and put where I want them, and then adjust the size back to the size I prefer to use in the post. If I want to avoid most of the difficulties of moving pictures, I will write the text and then insert the pictures where I want them. End of the fuss! The picture of the pond (below) was much larger, and the picture of the garden above, also smaller. I made them both small and moved the garden to the place above, then made it bigger. I hope you can follow this, I am trying to avoid using screen shots to illustrate.
This is the pond in the spring. Lots of cattails, algae, and clouds reflecting on the water.
I did notice that if I had any other pictures in the uploaded, that I did not use in the first go, they were not there for adding later. So I again, found the turtle on the computer, selected it to add to the upload and selected upload. Once loaded I selected it to add to the blog. Be sure to have the cursor where you want to add the picture or you will be moving pictures again!
Again, no room under the picture to add text so I clicked to the right, hit return/enter, and created this text and the text below about the turtle.
The turtle is a marine turtle, not a snapping turtle.
Other than this one time we have not seen one this large out of the water. We do see every once in a while a turtle head peeking out of the water in the middle.
March loafing... actually, this is before the heat when he would spend a good part of the day grazing. Now when it is hot he is in the shed on the right, called a loafing shed. He is seldom out during the heat, except to get a drink of water and the back to the deep shade of the shed. We think he does most of his grazing at night... not really sure because he blends in so well with the lightless pasture.
Another way to insert the pictures. Is to use the enter key to advance several lines, (at least 3). Place the cursor on the middle line and insert the picture. You will now have a blank line at the bottom as well as one above the photo.
All the tools behave as they have in the past, if you have used Blogger before. Highlight text you would like to format and use the icons at the top of the editor.
Please keep in mind that I am not a Blogger expert. This is what has worked for me... today and in the past. I urge you to play and discover... what works and what doesn't for you.
Also, save often and use the preview button (both are on the right side of the blog). You will find the save button when you use the down arrow next to preview.
Hope this helps someone... or two.
Beth


Good info but the last 2 days photos won't center. They load left and when I hit center nothing happens, I hit right and it moves right and I hit center again and it is 1/4" from the left. Everything had been working well until 2 days ago.
ReplyDeleteTry using the text centering option in the top controls if the center option in the picture controls does not work. If you have to move the cursor, sometimes that becomes the control for the loading picture. As of yesterday, the issues with blogger seem very tame after the Wordpress fiasco created after a huge Wordpress.org update.
DeleteThanks Beth.
ReplyDeleteHope it might help someone... Sometimes the work arounds are easier than the correct procedure to operate.
Delete